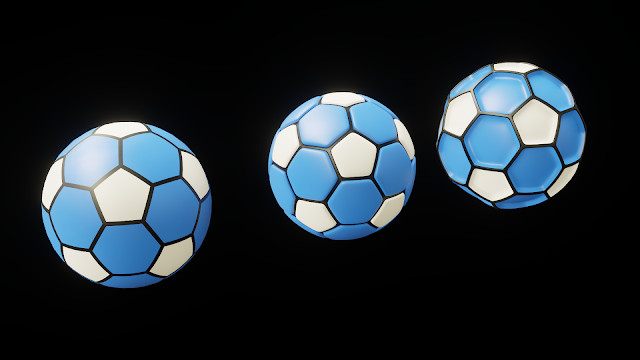
Creating a Fast and Simple Soccerball Shape
The video version of this tutorial can be found at:
Youtube: https://www.youtube.com/watch?v=-NhuwZ8ARAw
Vimeo: https://vimeo.com/348935375
In this tutorial, we are going to quickly make a simple soccerball shape.
First, create an Icosphere with 1 subdivisions.
Next, we create 3 material slots with the following materials:
Slot 1: Hexagons
Slot 2: Pentagons
Slot 3: Borders
The order here is important, and set the materials to different colors.
Also, we set the viewport shading mode to Look Dev, so we can see the material colors later.
Now, to create the Pentagons, add a Bevel modifier with the following options:
Only Vertices
Material: 1
Set Width so that the hexagons and pentagons are roughly the same size.
Next, to create the borders, add another Bevel modifier with the following settings:
Material: 2
Set Width so that the border isn't too big.
Now we are going to start on making it round. Add a Subdivision surface modifier with the following settings:
Levels: 2
Subdivision Type: Simple
Now add a Cast modifier with a Factor of 1.
And remember to set the soccerball's shading to Smooth.
Now we have a simple soccerball shape!
Now you can apply all the modifiers and edit the shape.
To easily select different parts of the mesh, go to Properties Panel > Materials Tab > Select.
That will select the faces that are assigned to that material.
Youtube: https://www.youtube.com/watch?v=-NhuwZ8ARAw
Vimeo: https://vimeo.com/348935375
In this tutorial, we are going to quickly make a simple soccerball shape.
Next, we create 3 material slots with the following materials:
Slot 1: Hexagons
Slot 2: Pentagons
Slot 3: Borders
The order here is important, and set the materials to different colors.
Also, we set the viewport shading mode to Look Dev, so we can see the material colors later.
Now, to create the Pentagons, add a Bevel modifier with the following options:
Only Vertices
Material: 1
Set Width so that the hexagons and pentagons are roughly the same size.
Next, to create the borders, add another Bevel modifier with the following settings:
Material: 2
Set Width so that the border isn't too big.
Now we are going to start on making it round. Add a Subdivision surface modifier with the following settings:
Levels: 2
Subdivision Type: Simple
Now add a Cast modifier with a Factor of 1.
And remember to set the soccerball's shading to Smooth.
Now we have a simple soccerball shape!
Now you can apply all the modifiers and edit the shape.
To easily select different parts of the mesh, go to Properties Panel > Materials Tab > Select.
That will select the faces that are assigned to that material.


Comments
Post a Comment